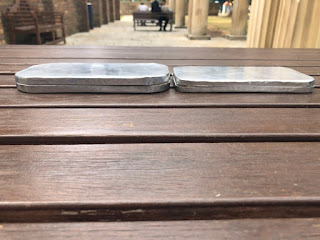
the TRAY
the TRAY : week four
purpose :
to use a combination of 'stretching' and 'shrinking' to create a continuous 90 degree bend around the sheet.
application :
this
exercise will teach us how to shrink the material to create sharp angles which could be applied to the openings of the fuel tank and how to work in a team with both members making a part of the whole object
tools :
● laser cut radius gauge ● two pieces of 10mm plywood ● disk sander ● nylon mallet ● metal sheet ● sanding table ● tin snips ● aluminum sheet ● a buddy to lend a hand ● patience ●
steps :
For the Shape:
1. Line up the geometrical center of the aluminum sheet with the plywood rectangle and mark the outline of the plywood onto the aluminum2. Place the chosen laser cut template onto the top right corner like the image below
3. Mark out the curve onto the corners of the plywood and repeat for each corner then repeat on the other plywood piece
4. On the aluminum sheet, mark out approx 10mm (can do more for a more challenging exercise) offset from the existing outline
5. Place two pieces of plywood next to each other with marked sides facing outwards
6. Tape plywood pieces together
7. Use the disk sander to file down the corner to the curved outline on all corners
8. Using tin snips, trim the corners of the aluminum rectangle down to the curved corners
9. Sandwich the aluminum sheet between the two pieces of plywood (with the marking on the plywood facing outward) and clamp in the vise
10. Using two nylon mallets, hit the corner of the aluminum to slowly bend the material around the plywood mould
11. Excess material will start to build up and the corners will become longer than the sides. To even this out, use tin snips to trim the corners down again. This will also make it easier to form the sheet around the corner as the less material there is the easier it is to 'shrink'
- You can see in the photo below that the material is starting to fold in the top right corner. This should be avoided at all costs because once the metal is folded it is almost impossible to unfold (note : I tried to unfold a corner which had folded for my 30 degree tray but the corner ended up cracking which meant I had to trim the sides down)
12. Continue this process of shrinking then trimming till the metal folds tightly around the plywood
- Make sure to keep an eye on the metal so it does not fold into the plywood which will result in your plywood being stuck in the tray like below
13. Use the sanding board to file down the metal tray so all sides are smooth and flat
general notes/reflection : this exercise was challenging because the corners are really something that you can't rush and you can't fix mistakes especially if there is an accidental fold in the corner. It has shown how the material can be quite unforgiving if forced too quickly into a form. For this exercise Jin and I decided to first try one of the larger radius (60 degree) on the corners to gauge if we would be up for the challenge of the 30 degree corners. The 60 degree radius turned out to be okay and was helpful in being the practice run in both forming the corners and working together to ensure both our pieces matched in the end. To ensure this we worked on the trays together to keep checking that they matched throughout the forming process. When we attempted the 30 degree radius it was a familiar process already. There were a few mistakes made (I accidentally folded my corner which resulted in the crack when I tried to unfold it and I trimmed the corner a little too small on one corner which meant the whole thing had to be trimmed shorter) but all in all we were pretty happy with how the 30 degree radius trays turned out.


Comments
Post a Comment